
Are you tired of that annoying creaking sound coming from your bike’s crankset? Or maybe it’s time for a much-needed upgrade? Whatever the reason, removing your bike’s crankset can be daunting. But fear not! Our ultimate guide is here to help you get the job done quickly and easily. Say goodbye to those pesky noises and hello to smoother rides with our step-by-step instructions and expert tips on how to remove bike crank like a pro. Let’s get started!
How to remove a bike crank?
First things first: before you begin, make sure that you have the right tools for the job. You’ll need a socket wrench and a crank puller, you can find both of these easily at your local bicycle shop.
The first step is to remove your bike’s pedals. You can do it with a pedal wrench or with an allen key. Once the pedals are off, you can begin loosening the bolts that hold the crankset in place. Start with the two bolts on the outside of the crankset, and then move to the inner bolts.
Once all of the bolts are loose, you can remove the crankset from your bike frame. Be careful not to damage your bike frame as you do so. With the crankset removed, you can now inspect it for any damage and clean it if necessary.
Tools Needed to Remove the Crankset
A crankset is the collection of components that make up the pedals and crank arms of a bicycle. The crankset is attached to the bike frame at the bottom bracket. To remove the crankset, you will need a few tools:
- Wrench or Socket Set: You’ll need this to loosen the bolts that hold the crankset in place.
- Screwdriver: You’ll need this to remove the chainring bolts.
- A bottom bracket tool: This tool is used to remove the bottom bracket from the frame.
- An Allen key: This is used to remove the pedals from the crank arms.
Step by Step Guide on How to Remove the Crankset
If you’re new to bike maintenance, removing the crankset may seem like a daunting task. But with our step-by-step guide, you’ll have that crankset off in no time!
- Step 1: First, you’ll need to remove the pedals. To do this, simply unscrew the pedal from the crank using a pedal wrench or an allen key. Once both pedals are removed, you can then move on to the chain.
- Step 2: Using a chain tool or a pair of pliers, gently remove the chain from the largest cog on the rear cassette. You may need to wiggle it a bit to get it started, but be careful not to damage the links. With the chain off, you can now remove the derailleur cables from their housing.
- Step 3: Next, locate the two bolts that hold the crankset in place. Using an allen key or a hex wrench, loosen and remove these bolts. The crankset should now be free from the bottom bracket. You can pull it away and set it aside.
And that’s it! Now you know how to remove your bike’s crankset. With a little practice, this process will become second nature and you’ll be able to do it in no time at all!
Cleaning and Maintenance
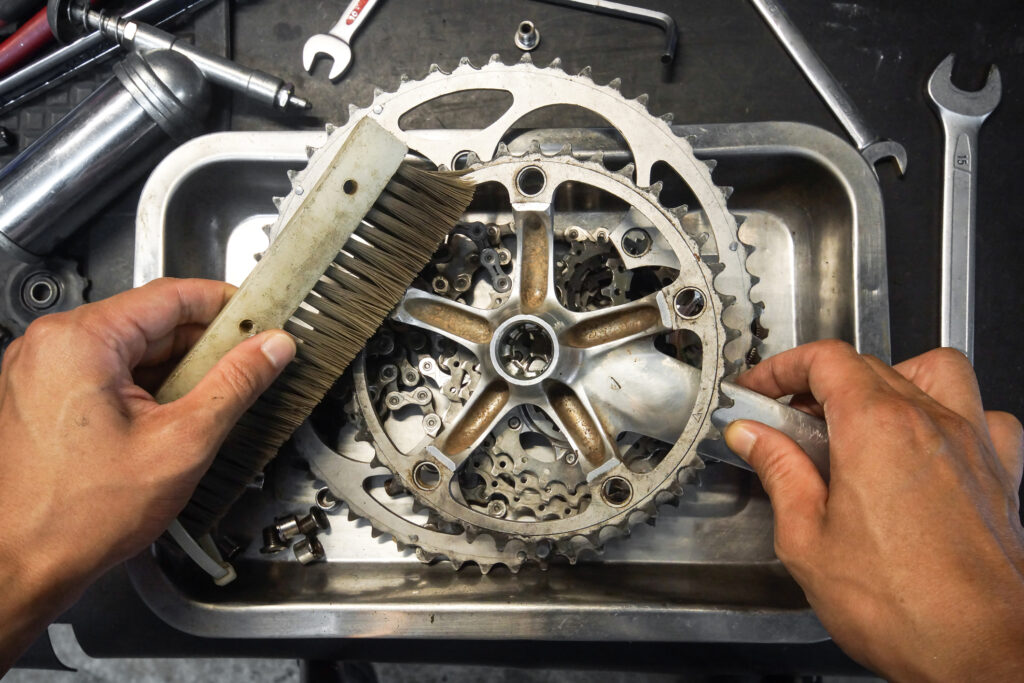
To clean and maintain the bike crank after removal, follow these steps:
- Use a degreaser and a brush to clean the crank and chainrings thoroughly.
- Dry the crank with a clean cloth, making sure to remove any excess water.
- Apply lubricant to the chainrings, chain, and derailleur pulleys.
- Wipe off any excess lubricant with a clean cloth.
- Inspect the crank for signs of wear or damage, such as cracks or bent teeth.
- If the crank is damged, replace it.
- Reattach the crank to the bike and ensure proper alignment and tightness.
Reassembling the Bike
To reattach the bike crank or replacement, follow these steps:
- Apply grease to the crank spindle and bottom bracket threads.
- Slide the crank onto the spindle and tighten the bolts to the manufacturer’s recommended torque.
- Check the alignment of the crank arms and chainrings by spinning the cranks and checking for any wobbling or rubbing.
- Adjust the crank arms as needed using a crank puller tool.
- Make sure the chain should be properly align with the chainrings and derailleur.
- Test the crank and gears for smooth operation and proper shifting.
- Make any necessary adjustments and retest until everything is functioning correctly.
Commonly Encountered Problems and Solutions
If you’re having trouble removing your bike’s crankset, there are a few common problems that might be causing the issue. Here are some solutions to those problems:
- If the crankarm won’t come off the spindle, try loosening the bolts that secure the crankarm to the spindle. If that doesn’t work, you may need to use a hammer or other tool to tap the crankarm free from the spindle.
- If the chainring won’t come off the crank spider, first make sure that all of the bolts should be loose. If they are, and the chainring still won’t budge, you may need to use a chainring removal tool to remove it.
- If you can’t seem to get the bottom bracket bearings out of their cups, make sure that you’re using the correct size bearing extractor tool. If you’re still having trouble, tap the tool with a hammer to start it. Once it starts, bear down on the tool with all your weight to remove the bearings.
FAQ
A: The tools you need will depend on the type of crankset you have. Most modern cranksets will require a crank puller tool, a bottom bracket tool, and a wrench or socket set.
A: You may need to remove your bike’s crankset if you need to replace the bottom bracket, the chainrings, or the crank arms. You may also need to remove it for cleaning or maintenance.
A: No, you will need at least a crank puller tool and a bottom bracket tool to remove most bike cranksets. Attempting to remove the crankset without these tools can damage the crank arms, bottom bracket, or other parts of the bike.
A: It depends on the condition of the old bottom bracket. If it is still in good condition and functioning properly, you may be able to reuse it. However, if it is worn or damaged, it is recommended that you replace it when reinstalling the crankset.
A: Yes, it is recommended that you apply a small amount of grease or lubricant to the bottom bracket threads and to the spindle of the crankset before reinstalling it. This will help prevent corrosion and make it easier to remove the crankset in the future.
Tips for Smooth Removal and Reinstallation of Bike Crank
- Always use the correct tools when removing or installing a bike crank. A crank extractor and bottom bracket tool are essential for this job.
- If you’re removing the crank to clean it or replace the bearings, make sure to do so carefully. Do not damage the threads on the crank arm or spindle.
- When reinstalling the crank, be sure to align it properly with the bottom bracket before tightening it down. Then, tight the bolts to the correct specifications with the help of torque wrench.
- Pay close attention to the chain line when reinstalling the crankset. A misaligned chain can cause shifting problems and premature wear on your drivetrain components.
Conclusion
Removing a bike’s crankset can be an intimidating task, but with the right tools and knowledge, it is a fairly straightforward job. We hope that this guide has provided you with all of the information necessary to safely remove your bike’s crankset in no time. Remember to take all safety precautions when attempting any type of bicycle maintenance and if you are ever unsure about what you should do, seek advice from a professional!


