“Are your bike brakes making squealing noises or not stopping as effectively as they used to? Don’t let brake issues put a damper on your cycling adventures! In this blog post, we’ll guide you through the process of adjusting your bike brakes, so you can hit the road with confidence and safety. Whether you’re a seasoned cyclist or just starting out, read on for our top tips and tricks to get those brakes in tip-top shape.”
What are Bike Brakes?
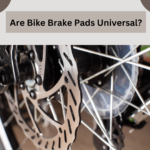
There are two main types of bike brakes: rim brakes and disc brakes. Rim brakes work by using pads to grip the wheel rims, while disc brakes use a caliper to squeeze a brake rotor attached to the wheel hub. Both types of brakes are effective, but disc brakes offer more stopping power and are less affected by wet or muddy conditions.
To adjust bike brakes, start by checking the brake pads to ensure they’re not worn down and positioned correctly in the brake calipers. If the pads need to be replaced, follow the instructions that came with your new pads. Next, check the brake levers to make sure they’re tight and adjusted correctly. Finally, test your brakes by riding your bike in a safe area before heading out on the road.
How to Adjust Bike Brakes?

Adjusting bike brakes is an important part of bicycle maintenance that helps ensure the safe and efficient operation of the bike. Here is a step-by-step guide to adjusting bike brakes:
I. Check the Brakes
The first step is to check the brakes and identify any problems that need to be addressed. Here’s how to do it:
- Squeeze the brake levers and see how much resistance they offer. If the levers feel soft or spongy, it indicates that there may be air in the brake lines or that the brake pads need to be replaced.
- Check the brake pads for wear. If they are worn down, they will need to be replaced.
- Inspect the brake cables for fraying or damage. If the cables are damaged, they will need to be replaced.
II. Adjust the Brake Pads
Once you have checked the brakes and identified any problems, you can adjust the brake pads. Here’s how:
- Loosen the nut that holds the brake pad in place. You may need to use a wrench to do this.
- Adjust the position of the brake pad so that it contacts the rim of the wheel squarely. Make sure that the brake pad is not rubbing against the tire.
- Tighten the nut that holds the brake pad in place.
III. Adjust the Brake Cable
The next step is to adjust the brake cable. Here’s how to do it:
- Loosen the nut that holds the brake cable in place.
- Pull the brake cable tight and then tighten the nut.
- Squeeze the brake lever and make sure that the brake pads are contacting the rim of the wheel properly.
IV. Center the Brake Pads
The final step is to center the brake pads. Here’s how to do it:
- Squeeze the brake lever and observe how the brake pads contact the rim of the wheel.
- If the brake pads are not contacting the rim of the wheel evenly, loosen the nut that holds the brake pad in place and adjust the position of the brake pad as necessary.
- Repeat this process until the brake pads contact the rim of the wheel evenly.
Conclusion
Adjusting bike brakes is an important part of bike maintenance that ensures the safe and efficient operation of the bike. By following the steps outlined above, you can adjust your bike brakes and keep them working properly.
Different Types of Bike Brakes

There are three main types of bicycle brakes: rim brakes, disc brakes, and drum brakes. Each type has its own advantages and disadvantages.
Rim brakes are the most common type of brake on road bikes. They’re simple to adjust and maintain and work well in all weather conditions. However, they can wear down your rims over time and don’t provide as much stopping power as disc brakes.
Disc brakes are becoming more popular on road bikes. They offer more stopping power than rim brakes, but they’re more expensive and require more maintenance. Disc brakes also don’t work as well in wet or muddy conditions.
Drum brakes are found on some cruiser and commuter bikes. They’re similar to disc brakes in that they offer good stopping power and don’t wear out your rims. However, they can be tricky to adjust and aren’t as effective in wet or muddy conditions.
How to Adjust Rim Brakes?
There are two main types of brakes used on bicycles: rim brakes and disc brakes. Rim brakes are the most common type, especially on road bikes and older mountain bikes. Disc brakes are becoming increasingly popular, especially on newer mountain bikes and some road bikes.
Rim brakes work by using friction pads that press against the wheel rims to slow down or stop the bike. Disc brakes work by using brake pads that grip onto a rotor mounted to the wheel hub to slow down or stop the bike.
If your rim brakes are not working properly, there are a few things you can do to adjust them. First, check that the brake pads are positioned correctly in the brake calipers. They should be centered over the wheel rims and parallel to each other. If they are not, loosen the screws that hold them in place and reposition them correctly.
Next, check that the brake levers have enough space to move freely. If they are too close to the handlebars, they may not be able to apply enough pressure on the brake pads to stop the bike. You can adjust the distance between the brake levers and handlebars by loosening or tightening the screws that hold them in place.
Finally, check that the cables connecting the brake levers to the calipers are not damaged or frayed. If they are, replace them with new ones. Once you have adjusted all of these things, test your brakes by riding your bike slowly at first and then increasing your
How to Adjust Disc Brakes?
Disc brakes are the newest type of brake on the market and they offer superior stopping power to the rim or drum brakes. However, because they’re a new technology, they can be tricky to adjust. Here’s a step-by-step guide to adjusting your disc brakes:
1. Start by releasing the brake lever. This will allow you to make adjustments without the pads rubbing against the rotor.
2. Next, use an Allen key to loosen the two bolts that hold the caliper in place. Be careful not to remove these bolts entirely, just loosen them enough so that you can move the caliper around.
3. Once the caliper is loose, take a look at how your pads are sitting in relation to the rotor. If they’re not aligned properly, they won’t make full contact when you apply pressure to the brake lever, which will impact your braking power. Use your Allen key to make small adjustments until the pads are lined up correctly.
4. Finally, tighten down the bolts on the caliper so that it doesn’t move around when you’re riding. Make sure that these bolts are tight – if they’re too loose, your brakes could fail entirely.
Faq
You may notice that your brakes feel spongy or unresponsive, or that your brake pads are worn down. You can also check for cable wear or damage. If you are unsure, it is always best to have a professional mechanic inspect your brakes.
Yes, adjusting bike brakes is a relatively simple task that can be done at home with the right tools and some basic knowledge. However, if you are unsure or uncomfortable with performing the task, it is always best to have a professional mechanic handle it.
It depends on how often you ride your bike and how much wear and tear your brakes undergo. It is recommended to inspect and adjust your brakes at least once a year, or more frequently if you ride frequently or notice any issues with your brakes.
You will need a wrench, Allen key, and possibly a cable cutter or pliers to adjust your bike brakes. It is best to consult a bike repair manual or YouTube tutorial to ensure you have the necessary tools and equipment for the job.
Conclusion
With the right instructions and a few simple tools, you can easily adjust your bike’s brakes. Knowing how to properly adjust your bike brakes is essential for ensuring that you are able to ride safely and confidently. If done correctly, it will make all the difference in improving your cycling experience. So don’t forget to give yourself a refresher once in a while to keep those brakes working perfectly!


